Android

Simple Image Wallpaper: Display Wallpapers in Their Full Glory on Your Android Device

Back in 2011, I wrote about how to set a wallpaper on the homescreen without cropping or getting a force-zoom on the selected image. (This is applicable on 10.1″ tablets.)

For the longest time, I was cheating the system so to speak by using PicSpeed HD Wallpapers to set wallpapers for me since it allows full images to be used without the need to crop them. Of course, given the resolution size of the images, unless they were 1920×1408 by default, they still won’t fit perfectly. But this alternative was better than the tablet forcing me to alter the picture I want to use every single time.

It was until recently — I’m guess it’s probably something with Android 4.1.x? — I’ve noticed that any wallpaper I set with PicSpeed ends up being autocropped and zoomed-in whenever I rebooted the tablet or after the a program or system UI stops functioning. I became annoyed so I searched for a solution. By chance, I came across Simple Image Wallpaper Free.

I honestly don’t care about live wallpapers but there was a review there that mentioned that wallpapers could be displayed without cropping so I decided to check it out.

Using Simple Image Wallpaper could be a little confusing since the instruction in the app description that reads “To use, go to the home menu, then Wallpaper -> Live Wallpaper” means nothing to me. I’m not sure about other folks but I don’t have a home menu at all; long pressing the home button only gives me a history of apps recently used.

Anyway, this is what I had to do to use it:
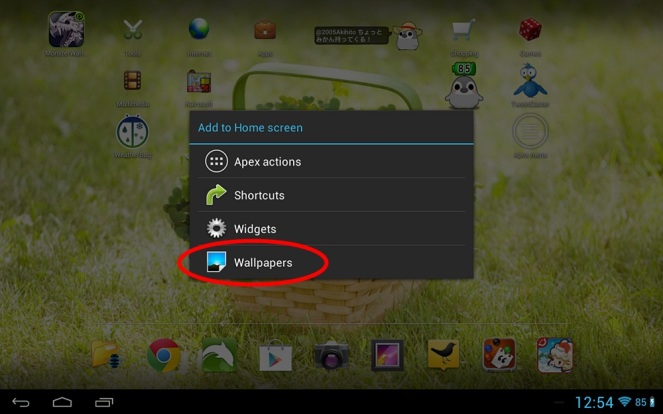
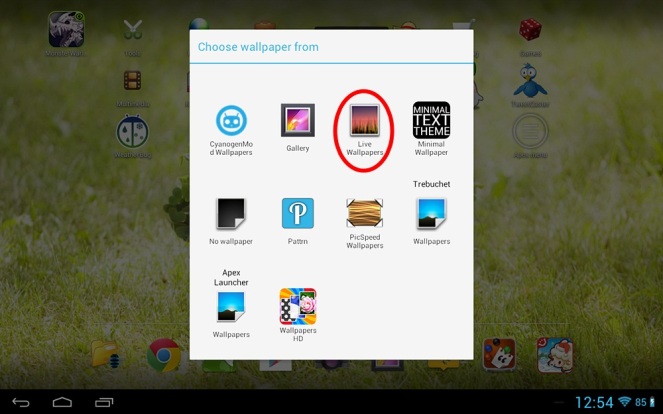
Long press on an empty spot on your home screen so that a context menu like the above will show up. Select Wallpapers.
Choose "Live Wallpapers"
Choose “Live Wallpapers”
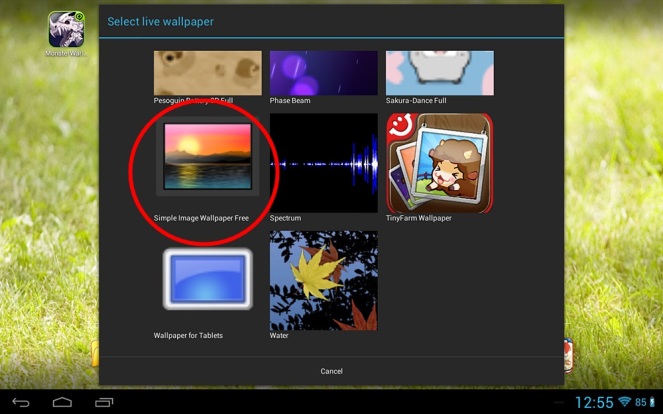
Tap on "Simple Image Wallpaper Free". You may need to scroll a bit to find it depending on how many items are in your menu.
Tap on “Simple Image Wallpaper Free”. You may need to scroll a bit to find it depending on how many items are in your live wallpaper menu.
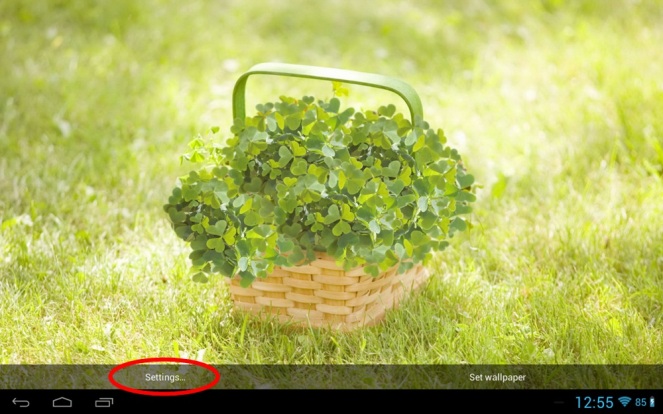
You should see an image of your current wallpaper. Even if you don't, choose "Settings..."
You should see an image of your current wallpaper. But even if you don’t, choose “Settings…”
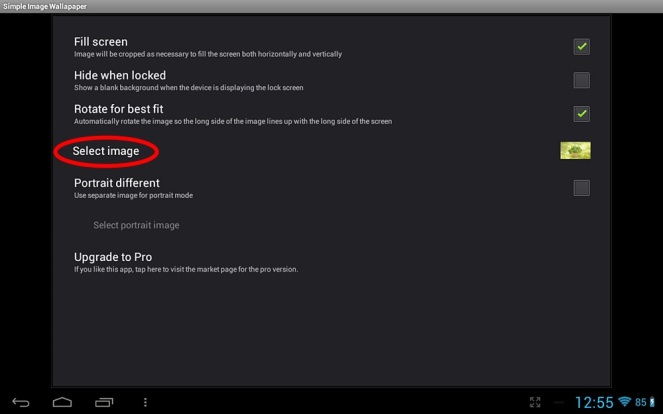
Choose "Select image". You will be presented with either several options of the app you want to use to get the image or the system gallery and its categories. Simply choose an image from there. Hit the back button to return to the screen that had "Settings..." and "Set wallpaper" at the bottom and choose the latter option.
Choose “Select image”. You will be presented with either several apps you want to use to get the image or just the system gallery and its categories. Simply choose an image from there.
Hit the back button to return to the screen that had “Settings…” and “Set wallpaper” at the bottom and select the latter option.

I don’t show the result since I didn’t change the wallpaper I was using for this little tutorial. ^^;

Overall, I’m happy with Simple Image Wallpaper because since I started using this program, my wallpapers stay the way they are even after rebooting. 😀 I’m considering buying the Pro version now due to the fact that it provides the option to use another image for the lock screen.

Android

Little details one should know about the Galaxy Tab 10.1 & Android in general

So I’ve been doing some rounds on Yahoo! Answers for the heck of things and find that there’s still quite a bit of interest in the Galaxy Tab 10.1 (and its successor the Galaxy Tab 2 10.1). I’ve written up a summary of thoughts about the tablet when I purchased it back in October of last year. You can see those here: https://koukoupuffs.net/2011/10/14/impressions-of-android-honeycomb-3-1-the-galaxy-tab-10-1/

I’m going to expand on those now. It’s almost been a year of trying it out, after all. 😀 Most of these are negatives though. (I actually posted this in a reply on Y!A too.)

Continue reading “Little details one should know about the Galaxy Tab 10.1 & Android in general”

Android

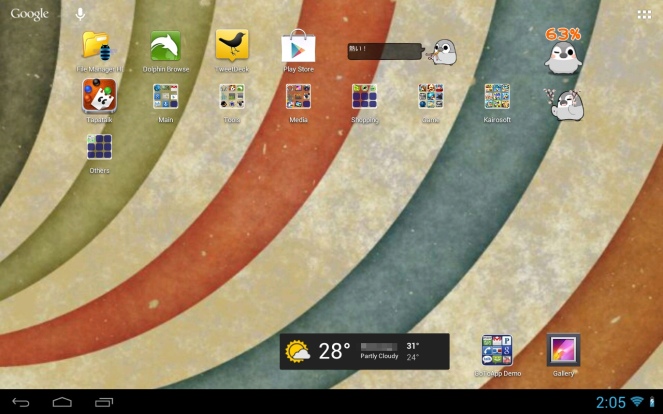
New home screen wallpaper XD

Click on image for larger size~

I honestly can’t remember where I found this. The wallpaper apps I use on Android are PicSpeed HD Wallpapers and Wallpapers Bay for Tablet. Both are decent but PicSpeed gets bonus points for having a search function and giving users the ability to make use of full size images instead of cropped versions. You even get a context menu option installed which will let you do the same with images already in your device’s gallery.

Android

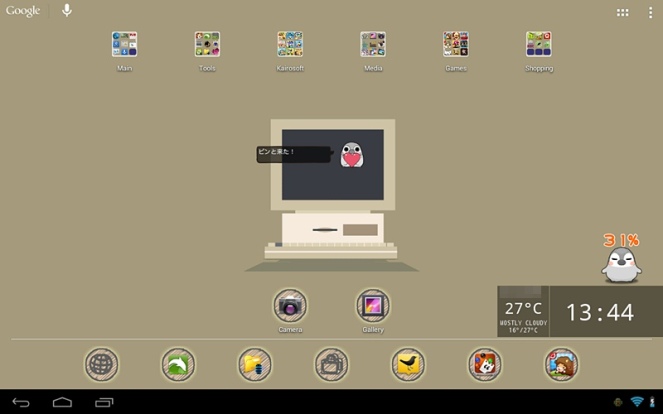
Current home screen look/layout on my Galaxy Tab 10.1

Nova Launcher with rainy Theme (for Go Launcher EX) icons
Nova Launcher (not that you can tell) with rainy Theme (for Go Launcher EX) icons. The weather & date are part of the Glass Widgets bundle. Folders are from the GoToApp Demo.

I love skinning and applying themes to operating systems for my computers and mobile devices. I fiddled around with Go Launcher EX last night and then eventually moved to Nova Launcher. I might go back to Go Launcher EX since I’m too lazy to manually tweak my home screen and icons. XD (There are some visual issues with it though since it’s not optimized for tablet use. I haven’t tried the HD version yet.)

Anyway, yeah, I know Jelly Bean allows for folder creation but when I install a new launcher, I have to recreate all of them. (At least, that’s what it seemed like.) With GoToApp, it’s simply a 3-step process to have it recreate all folders since I already organized all my apps beforehand.

The one thing that always throws a wrench into layouts is the Pesoguin Talk app which is the one you see in the middle with the little penguin and a heart. It’s a slightly bizarre widget that spans 1 x 3 squares. The thing is, it could have simply been 1 x 2 and everything would fit all nice and tidy. But because it’s 1 x 3, there’s excess empty space on the right side of the penguin which always results in an awkward gap. Choosing to overlap icons doesn’t make things better because Pesoguin partially takes up the third square. 9_9

Oh yeah, the wallpaper is from Simple Desktops. Here’s a direct link to the page: http://simpledesktops.com/browse/desktops/2011/sep/21/mac-and-back-to-basic/

I’ll probably still take a look around and see what other launchers there are. Really hoping to find something that’ll either ignore the icon grids or shrink them. I want things to be more densely packed and the freedom to put shortcuts anywhere. I already modified it a bit through Nova Launcher but it’s not enough. ^^ I would also like the ability to select multiple shortcuts since, sometimes, when I’m rearranging things on the home screen and want to place everything on one side, it’d go a wee bit faster than to select, hold, and move each one separately. There’s a tweak for this for jailbroken iOS devices but I can’t seem to find one for Android. :/

Edit: Redid the layout a little. ^-^

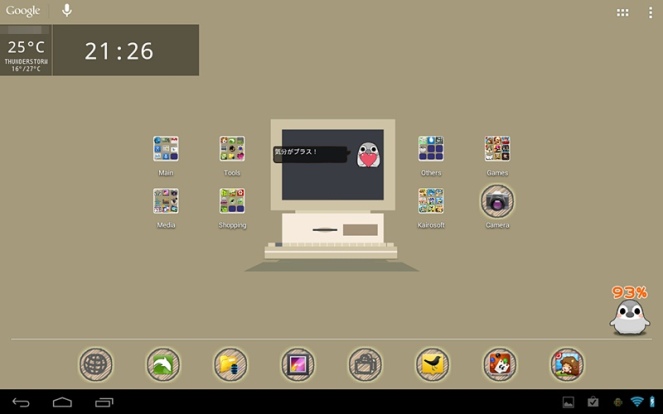
Redid the layout (Nova Launcher)

Oh yeah! I managed to resize the Pesoguin Talk widget properly so now there’s no extra space on its right side. For some reason, when I tried it last night, all it did was shrink the penguin but the speech balloon stayed the same size. ^^ I wonder if changing the number of columns did something? It was set to 8 columns before but now it’s at 10 columns.

BTW, what you see in the above screenshots is totally doable without rooting. However, I think root access is needed to show widgets in the drawer but it’s an option in the settings so if you don’t have root or don’t want to give Nova access to it, then there’s no big loss as it won’t affect the launcher in any way.

Try and accomplish THIS level of customization on an iPhone, iPad, or iPod touch without jailbreaking. It won’t happen. It will probably NEVER happen.

Android

Rooted and ROM’d!

I finally made the decision to root my Galaxy Tab 10.1 and “upgrade” to Android 4.1.1. I don’t regret it for a second. I LOVE Jelly Bean so far. The jump from Honeycomb 3.2 to Jelly Bean 4.1.1 is …. wow. *___*

I primarily used the tutorials and downloads from http://galaxytabhacks.com/ to root and install the custom JB ROM. The process was very quick and went through without any issues.  (Reading the comments on one of the articles will tell you have to get USB data transfer access again as well as Flash.) The ONLY thing I ran into was during the prepartion stage where I was trying hard as hell to move 1.5 GBs of data off the tablet onto my computer. For some reason, Windows wasn’t reading all the files in the Titanium Backup directory. It didn’t occur to me to simply disconnect and reconnect the USB cable so it can re-read the data. 9__9  Instead, genius me spent about 2 hours (maybe even more!) trying to upload everything to Box. When that went at a snail’s pace, I opted to create an archive of the directory which was also slow as hell.

When the zip file was ready, I connected my Tab to the computer and suddenly, it was able to see every single back up file. WTF? >_____________>; So in the end, I used the original method of copying over files anyway. 😛

Anyway, once that was done and over with, I installed AOSP to see how it was. I totally loved it. It was so minimal and fast and the user interface was beautiful and clean. For a while, I was missing the lack of the screencap button that the Samsung’s TouchWhiz had by default but was told that a simple press and hold of the Power button + down volume button would accomplish the same task on Jelly Bean.

My Galaxy Tab 10.1 with CyanogenMod 10
Not that you can really tell but this is on Android 4.1.1~! (Click on image to see full size~!)

After a few minutes of exploring the new firmware, I installed CyanogenMod 10. I probably didn’t NEED to considering I’ve yet to even touch the icons of the apps that it came pre-installed with. ^^ Still, since it doesn’t seem entirely diferent from AOSP, I’ll be sticking with this.

I never tried Ice Cream Sandwich so I don’t know how much of a step up Jelly Bean is but from what I’m experiencing so far, I wish Samsung would have waited before working on TouchWhiz for Android 4.0. Well, not that I really care since I have no intention of going back to their bloaty, tweaked firmware.

For me, right now, Jelly Bean + root > iOS 5.1 + jailbreak. (I’ve yet to upgrade my iOS firmware. XD) Seriously loving what Google is offering with its operating system. Now if only the games and apps would be better …

shopping

New Trent iGeek 9900 mAh External Battery for Apple Devices & Others!

Seeing that the battery of my iPod touch 4G drains rather fast, I didn’t want it dying during my time at PAX East with all the line-ups and stuff so I purchased an external battery pack. I’ve used it 3 times already and it’s really great!  But the one extremely great thing about it is that is also comes packaged with a USB adapter for the Galaxy Tab 10.1 (among some other adapters) which allows it to charge via battery OR — and this is the best part — a USB port on a hub or a computer~!

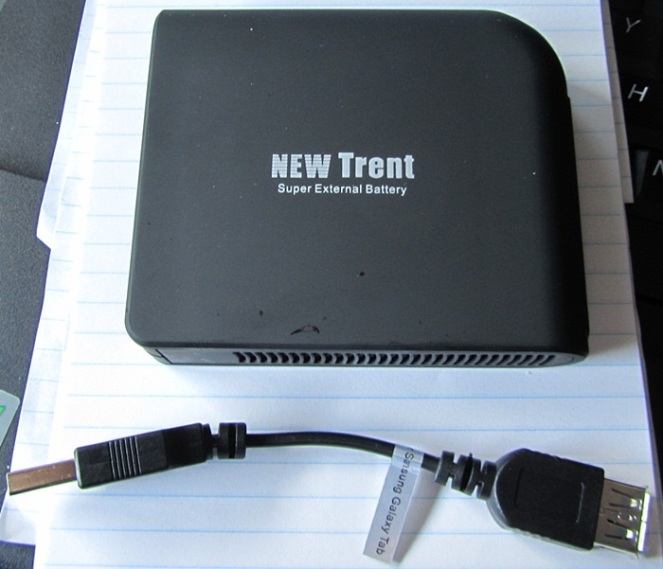
Here’s a photo of the battery and the adapter:

iGeek External Battery Pack with USB adapter for the Samsung Galaxy Tab 10.1

The battery doesn’t weigh very much and lasts quite a while! I did a charge with my Tab from about 30% with a fully charged iGeek and while the tablet power got to 100% in a few hours, the battery pack still wasn’t emptied~! In fact, it still had two bars left in its own charge.

Now about the USB adapter~! I can FINALLY use the Tab while sitting at my computer or sitting on my bed~! XD For those that don’t know, Samsung, in their infinite wisdom, has made a proprietary and pathetically short cable for the Galaxy Tab 10.1. The cable, without factoring in the connectors, measures about 3 feet or 36 inches. Apple’s cable for the iPod touch (and probably iPhone and iPad as well) measures 3.5 feet or 42 inches. Believe it or not, that half a feet makes a huge difference for me. Hell, I even bought a much longer cable for my touch too. I thought about doing the same for the Tab but then I came across the external battery pack and ALL IS WELL.

Charging the Galaxy Tab 10.1 with a USB hub
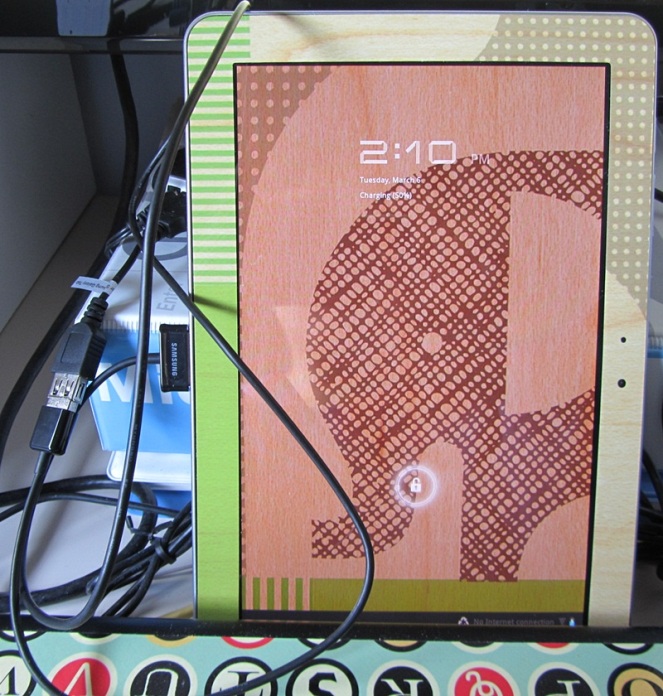
Look at this! Charging the Galaxy Tab 10.1 from a USB 2.0 hub! AMAZING!

Anyway, I bought mine from ThinkGeek (http://www.thinkgeek.com/gadgets/travel-outdoors/eb7b/) but I FORGOT there was a newer, longer-lasting battery as well.  You can get either one from Amazon.com and other retailers as well. 😀

Android · shopping

iLuv Folio Jacket for the Galaxy Tab 10.1 (iSS910BLK)

I bought this case from TigerDirect Canada 2 weeks ago and received it today~!  (It was on backorder in case you’re wondering if it actually took 2 weeks.) However, I think they no longer carry it since after I made the order, the product page showed that it was no longer available.  Amazon.com carries it as well and still has stock as of this entry.  If you look around Amazon, you’ll see there are several manufacturers that make similar cases.  I can’t vouch for the quality of those ones since this is the only folio jacket I’ve never owned for the tablet.

The look and feel is basically what you would expect from a leather case. iLuv’s is classy and doesn’t feel cheap.  The stitching is well done too.

The nice thing about this case is that, unlike some other ones on the market, you don’t need to have it fully open to access the charge/data port at the bottom.  All you need to do with this one is to detach the latch.

Otherwise, it sports a pretty generic design such as sliding in the tablet from the side with a tuck-in flap, the back having a window for the back camera, and the sides having openings for the speakers. The power, volume buttons and headphone socket are covered when the jacket is closed.  On the bottom, there’s a little cutout for the mic which remains exposed even when the latch is in lock position.

Here are some photos of the case.  Sorry about the haphazard sizes; I like to crop images (so they show as little of my room as possible). ^^; Also, my Tab has colours around the border because it’s skinned.

One beef I have with this jacket is that the upright position is rather steep.  I prefer the angle to be wider as it makes it easier to type on the on-screen keyboard.  To get around this, I don’t connect the latch to the cover and have something behind it to keep it in place.

Another one is that the plastic packaging was rather difficult to open. >_>

Android · shopping

GelaSkins!

image

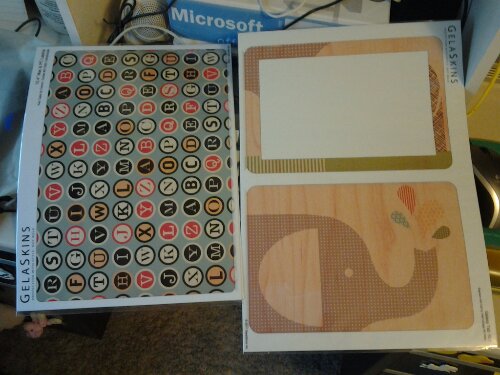
Ordered on Saturday, got them today! 😀 Of course, I only live like 30 minutes from the GelaSkins office. XD!

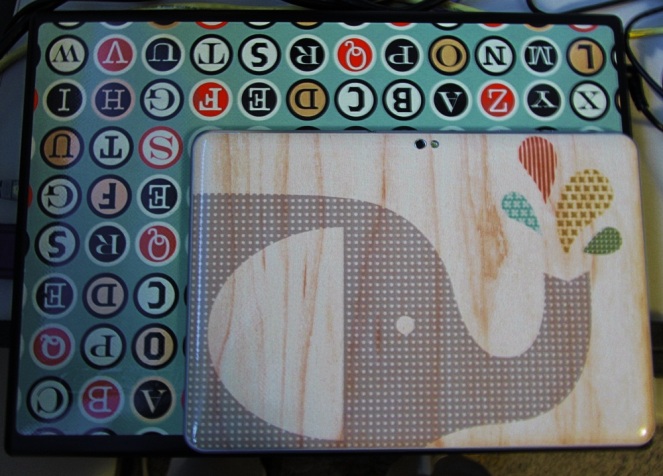
Skinned!! The colours are off because I had warm lighting from the right and cold light coming in from the window 😛  Actually, that’s kind of apparent in the pic above too although the colours are more accurate.

Oh yeah, I know it looks like there are bubbles on the notebook skin but that’s actually an embossed Lenovo logo. >_>